El Cheapo $30 Awning
Okay, you asked for it. Well, Jim did anyway.
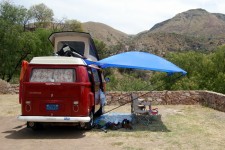
Here’s my solution to the VW bus tent issue. I wanted something small and light. I wanted something that would attach to the bus. I wanted it quick and easy to set up. And, it had to be cheap.
The vintage tents that go with the old Westys are collectors items and go for over $300. Plus, they are big heavy canvas with lots of large aluminum poles and take up lots of room. Don’t bother trying to tell me they’re no problem – I’ve seen folks lug these around and struggle to put them up. And, $300? Forget it. I’m cheap and I’m hauling it across continents.
I’ve seen some attractive newer awnings and actually tried to order one before we left on this trip, but they were out of stock. Besides, it wasn’t exactly what I wanted and cost $120. Still not my idea of cheap.
I’m a do-it-your-selfer, so I “made” my own. It was simple and the best part – it was only $30. Want one? Here’s how.
Go to Sam Walton’s global mega-corp and buy their cheapest free-standing tent awning. Ours started life as the “Ozark Trail 9′ x 9′ Dining Canopy”
Throw away all the string/rope that comes with it. You don’t want this – it will just get tangled up anyway. Get rid of those stakes too. I’m still carrying our strings and stakes thinking I might need them for something, but so far I haven’t.
Go ahead and put together the nylon roof using the shock-corded fiberglass poles and the canvas top so you can see how it will all go together.
The kit comes with four pieces of shock-corded aluminum poles (3 sections each). Take two and set them aside. Take the other two and go find your snips or wire cutters. When the corded-pole sections go together, one section is the obvious top – it has a little hook ring on it. Cut the shock-cord (actually a thin wire) that connects this pole section to the other two. Do the same to the other one. You now have two poles with 3 sections and two poles with 2 sections.
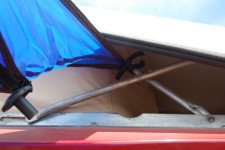
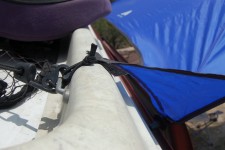
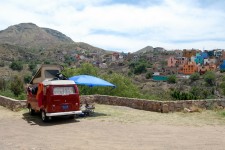
You’re now ready to put it on your bus. The tent has some bungee-hooks on the corners, so connect two of these to your bus. I put the front one on the pop-top hinge and the other on the luggage rack. You can probably do this in reverse for later-model buses. You can modify this slightly after the whole thing goes up and you can decide how you want it to rest. I keep meaning to re-tie my bungee to the plastic pole inserts so the edge of the tent sits higher up on the bus roof.
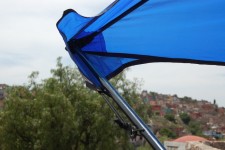
Now, get your poles with 3 sections and connect them to the tent as originally intended (bungee hooked to the hook-ring on the pole.) Now, get the modified poles (2 sections) and slide them into the bottom of each of these poles and put the bottoms in your wheels. You’re done!
Verify the sliding door slides all the way and you can open your front door with no problems. It’s good!
The whole thing goes up in about 5 minutes with only one person. Do it twice and you’re a pro.
No problems with wind, but we’ve been in pretty mild climates. Hang some sort of weight from the center of the tent (like a lantern) and the added weight actually helps keep the whole thing sturdier in the wind. If you must, you could tie down the far ends with the extra string and tent stakes, but… me no like strings and stakes.
It’s ultra-light. Small. And did I mention it was only $30?

http://www.ludwigandgertie.com/2009/07/painted-rocks-state-park.html
http://www.thesamba.com/vw/forum/viewtopic.php?t=344298&postdays=0&postorder=asc&highlight=walmart&start=0
Alright,
whc03grady.
Hey MacGyver, fine job with that awning! Those Enchiladas Mineras, along with a couple cervezas, have to be great 🙂
Super posts & pics-have fun!
M&M
How much did the papel picados cost to decorate the tent (illustrated in a previous post)? Very colorful!
30 pesos (around $2 USD) for 5 meters. They are a fairly sturdy Mylar(?) plastic. Place your orders now!
You got me – it’s the El Cheapo $32 Awning 😉
Very cool! I like the clothesline you came up with in that last picture as well!
Ok….I have finally gone over to the dark side…
My first Wal-mart purchase.
After reading all the posts from the Samba threads…I had to get one of those tarps..it looks like they’ll work perfectly on a VW bus. and,,,$29.88 + $3.97 shipping is too good a deal to pass up!
Thanks for the tip!
Wow, that’s a pretty great view from your porch! Cheap awnings are great. Nice work!
Pingback: San Cristobal de las Casas | Bodes Well
Pingback: Bodes Well » Playa Uva
$30.00 for an awning!? That is a great price! I need to find one like that to use for my camper.
Our family is going to give this one a shot. I’ll let you know how it turns out. 🙂
he said, four years later.